Archive for the ‘Mandy’ Category

Thanksgiving turkey

Wednesday, November 10th, 2010
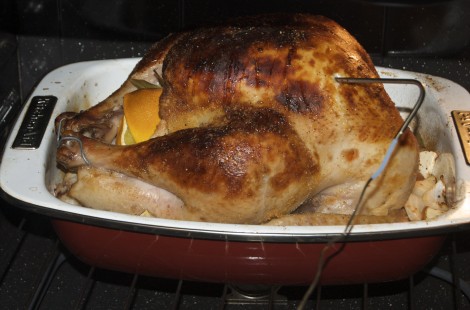


Since we are coming up on Thanksgiving in the next couple of weeks, I wanted to re-post our turkey recipe. The key to this recipe is to brine the turkey the night before. A brine is a very salty solution that you soak the bird in for several hours, depending on the size. The salt soaks into the meat leaving it the juiciest turkey you’ve ever tasted. It’s a little time consuming but it makes all the difference. You will never eat dry turkey ever again. The question I always get asked is if it’s makes the bird too salty. The answer is no, it mainly keeps the moisture in while giving it a slightly salty taste. I promise you wont feel like your eating a brick of salt. They make brining bags that are great for smaller turkeys or chickens but normally for a bigger bird we use a water cooler or an ice chest that is designated just for poultry. It is a little more clean up, but I always have a hard time keeping the bags sealed with that big of bird in it; and this way you can put the turkey in the brine, set it in the garage and get it out the next day ready to cook.

I always like to remind everyone also to please be careful when working with raw poultry. Wash your hands, the sink and the counter top very frequently during the process so you don’t give all of your guests Salmonella. Not a good take home gift.

When you actually cook the turkey it’s pretty easy. We use to make our own secret rubs and sauces until we were in Georga once and Jace’s brother just rubbed a bunch of Tony Chachere’s creole seasoning on their turkey. It was so good we threw out all of our recipes and went and bought a bottle of the stuff.

Another thing to note is that a brined turkey will cook a lot faster than a not brined turkey. Something about the salt and increased mass and something else. We’ve had them fully cooked an hour faster than we thought it would be ready, but they’ll also stay warmer a lot longer, too.

Thanksgiving turkey
Hardware:
brining bags, water cooler or small ice chest
large stock pot to make the brine
roasting pan

Ingredients:
thawed turkey
2 quarts apple juice
1 lb brown sugar
1 cup kosher salt
3 oranges (quartered)
6 bay leaves
1 tsp ground clove
1 tsp black peppercorns
2 gallons water (anything but Midland water…yuck)
ice (one bag should do it)
Tony Chachere’s creole seasoning
5-6 stalks of celery
4 large carrots
5 cloves garlic
1 large onion

Put all ingredients (except the water, celery, carrots, garlic and onion) into the stock pot and heat until the sugar and salt have dissolved. Let the solution cool so you don’t cook your bird. I make mine the day before we start brining and put it in the refrigerator.
The day before you cook your turkey, when you are ready to brine, unpackage the thawed bird and take out all of the grossness inside the cavities. Put the bird into either a brining bag or cooler and pour the brine over the bird. Fruit and all. Top it off with water until it covers the bird totally. If you are using a brining bag place it in the refrigerator, if you use a cooler pour in the ice to keep it cold. We store ours in the garage because it will keep it cooler than in the house. Let it sit overnight.

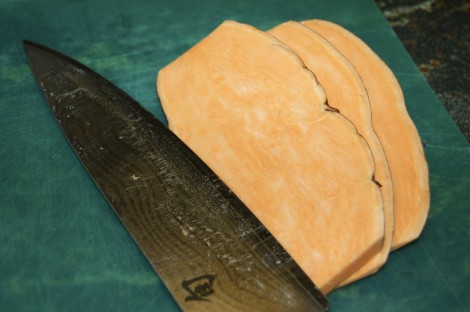
The next day, when you are ready to cook, get out the celery, carrots, garlic and onion. Chop the celery, carrots and onion into big chunks and peel the garlic. Place all veggies into the bottom of the roasting pan. Get the bird out and pat it dry with paper towels. It’s a messy job so don’t be wearing your Sunday best. Cover the bird in the Chachere’s seasoning (don’t be shy with it) and place the bird on top of the veggies in the roasting pan. Shove the oranges from the brine into the cavity. Cook until the bird reaches 160 degrees in the breast, mine normally take 2-4 hours so leave yourself plenty of time. We use a 350°F oven and it’s almost always perfectly crisp on the outside and juicy on the inside, but sometimes it can get too crisp on the outside. If that looks like it may happen, just pull it out and cover the breasts with foil. Remove from the oven and let it rest for about 30 minutes before you carve and enjoy. The rest will help the juices mellow so that you won’t spray them everywhere with your first cut. Also, the turkey is hot and will take at least that long to get to where you can keep your hands on it long enough to carve.

Weekly meal plan 11.8.10

Monday, November 8th, 2010


Since we are having Thanksgiving at our house this year, I am starting to do trial runs on most of our Thanksgiving recipes. I really don’t want to screw them up on Thanksgiving day. So, as I get the recipes down I am going to put them up here so you guys can use them too if you would like. This week I am going to showcase our turkey recipe. I posted it a couple of years ago, but it was very vague so I am going to go into a little more detail. Try it, I promise you won’t be disappointed!

Here’s this weeks plan.
Tonight: beans and cornbread (I’m making lots of cornbread to do a stuffing run through tomorrow)
Tuesday: sautéed chicken and cornbread stuffing
Wednesday: some sort of soup in the crock pot
Thursday: beef quesadillas
Friday: date night

Andes Mint Brownies

Wednesday, November 3rd, 2010


I would like to think that I’m a professional brownie eater. Yes, I know that not everyone can be as skilled at eating brownies as I, but I think God just blessed me a little more than others. I know all you women just read that, and are opening a new screen now to send me ugly emails.
So, when I found this recipe I new I hit the jackpot. They are gooey, very chocolaty and everything you could want in a brownie. I got the recipe out of one of my favorite cookbooks, Desserts by the Yard by Sherry Yard. I have made lots of desserts out of this book and all of them have come out really well. I would highly recommend keeping this book handy. It would also make a really good Christmas gift.


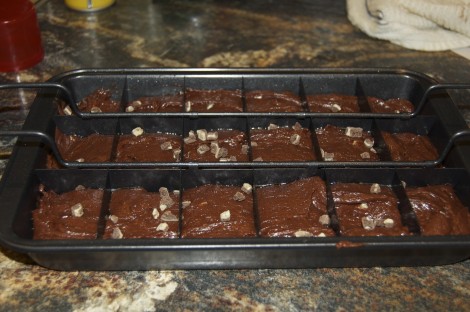
I also just got a new brownie pan that I wanted to show everyone. It’s the Perfect Brownie pan. One of the things I hate about brownies is you can’t put them in the pan and have them come out very pretty. I was very skeptical when I saw this on TV, but I went ahead and picked one up. My brownies come out perfectly now. I was shocked! All you do is spray the pan and the grates well with spray, pour your mix into the pan, then place the grates down into the mix. After they are cooked you place the pan on the little stand it comes with and the brownies pop up. You can then remove the grates and voila, perfect brownies.

In this recipe I threw in some Andes Mint chips. You can add whatever you want to them from m&m’s to chocolate chips just mix them in with the dry ingredients before you mix it with the wet ingredients. That way they don’t melt into your batter when you cook them.


Andes Mint Brownies
adapted from Desserts by the Yard

3/4 cup plus 2 tablespoons all-purpose flour
1/4 teaspoon salt
1 stick unsalted butter
1 1/2 tablespoons brewed coffee (trust me it makes the chocolate so much better)
1 ounce unsweentened chocolate, finely chopped
7 ounces bittersweet or semi-sweet chocolate, finely chopped
2 large eggs
1 cup sugar
1 cup Andes mint chips

Preheat the oven to 350 degrees and spray your brownie pan with non-stick spray.
Sift together the flour and salt. Add the mint chips, stir to coat and set aside.
Put the chocolate and butter in a microwave safe bowl and heat at 50% power for 2 minutes. Stir until the mixture is smooth. Pour the coffee in and stir carefully to combine. Allow the chocolate mixture to cool a bit.
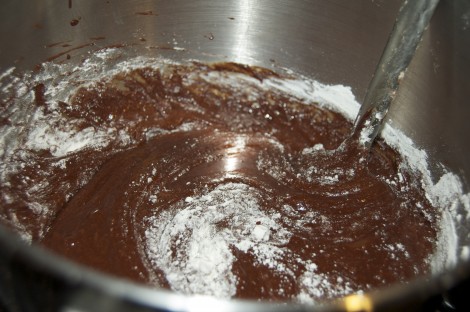
In a stand mixer or bowl with a hand mixer beat together the eggs and sugar until they are light and fluffy. Using a whisk, gently beat in the chocolate mixture. Fold in the flour mixture.
Pour the batter into your prepared brownie pan. (If you’re using the Perfect Brownie Pan place grates inside the pan)
If desired sprinkle some of the mint chips on top of the batter.
Place in the oven and bake for 25 to 30 minutes until slightly firm to the touch. A toothpick will not come out clean.
Let the brownies cool and either remove the grates of the pan or cut into squares.
Enjoy!

Happy birthday Jace!

Monday, November 1st, 2010


We have a crazy week planned this week so I’m not doing a meal plan.

I want to take time to wish my amazing husband a happy birthday. You truly are my other half and I’m can’t picture my life without you. So I have a list for you!
…Thank you for letting me dance like an idiot in the car and not laughing too hard
…Thank you for buying me new printers when I am yelling at the top of my lungs at ours
…Thank you for eating healthy food even though you want fried food
…Thank you for matching socks because I hate doing it
…Thank you for loving me. You are the best husband ever.

Happy birthday!

Browned butter chocolate chip cookies

Wednesday, October 27th, 2010


I have found the one smell that makes my husband melt. No, it’s not my perfume or anything sweet or romantic, it’s browned butter. Just throw some butter in a pan and cook it until it is almost burnt and I can go buy whatever I want. Yup, that’s my secret to getting what I want.

Last week required chocolate chip cookies. It was like I woke up one morning and decided I had to make them. So I threw some together one evening and satisfied my craving. I’m weird like that. These are a little sweeter than your back of the package cookie recipe but the hint of brown butter you get is so good! Another great thing about these cookies are you don’t need a stand mixer. So they are a very easy clean up.


Browned butter chocolate chip cookies
adapted from Dinner with Julie

3/4 cup unsalted butter
1/2 sugar
1 cup brown sugar
2 eggs
1 1/2 tsp vanilla extract
2 cups flour
1 tsp baking soda
1/2 tsp salt
1 cup chocolate chips

Preheat the oven to 350 degrees.
Put the butter in a skillet over medium heat. Cook until dark brown, almost to the point where it looks burnt, shaking the pan every once in a while so it cooks evenly.
While that’s cooking combine your brown sugar and regular sugar in a large bowl.
Pour the hot browned butter into the sugar mixture and stir to combine. Wait about 5 minutes for the mixture to cool so you don’t scramble your eggs.
Add the eggs and vanilla and stir to combine. Then, add the flour, baking soda and salt. Stir to combine.
Stir in the chocolate chips.
Spoon onto cookie sheets and cook for 10-12 minutes or until they just turn golden brown. Cool and Enjoy!

2025 © Mandy and Jace is proudly powered by WordPress
Entries (RSS) Comments (RSS) | Esther Theme By Patrick